
Etosha car window photography becomes much easier when the window is treated as a support rather than an obstacle. The door can steady a camera close to eye level, shelter part of the lens from wind and keep every passenger legally inside the vehicle. It can also transmit engine vibration, scratch equipment or force an awkward composition if used carelessly.
The solution for Etosha car window photography is a repeatable setup: stop in a safe authorised position, leave room for other road users, switch off the engine when appropriate, support the lens without hard contact and compose before the animal reaches the best point in the frame. That routine is faster than trying to rebuild the camera position at every sighting.
These Etosha car window photography techniques apply to a self-drive car and to a guided safari vehicle, although the available space and supports differ. Follow the driver’s instructions, every park rule and the animal’s behaviour before worrying about sharpness.
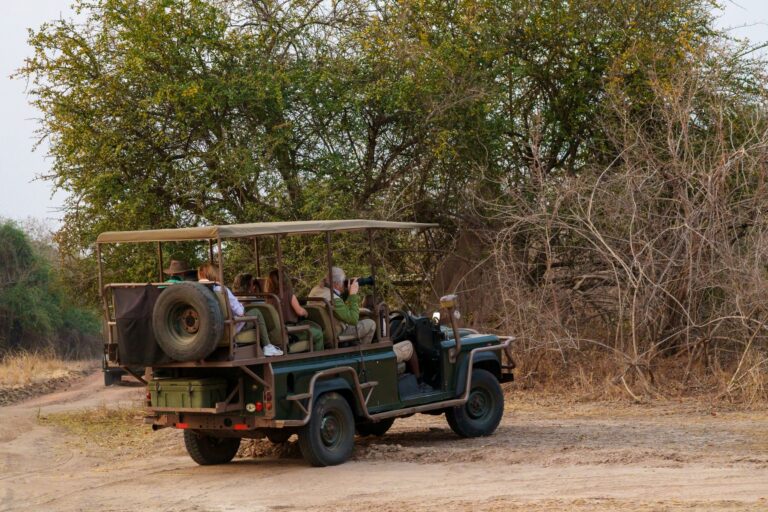
Etosha car window photography starts with support
A bare lens resting directly on glass or metal is rarely stable. The hard contact transfers small vibrations and can damage the finish of the lens barrel. Place a soft beanbag over the lowered window or door edge, then rest the lens foot or a broad section of the barrel on it. The bag should support the weight without blocking the zoom or focus rings.
Fill a travel beanbag after arrival rather than carrying heavy rice through an airport. Lightweight plastic beads are easy to transport but can escape into the environment, so use a strong inner bag and sealed outer cover. Locally bought dry beans or rice can work where permitted, but do not leave food in the vehicle overnight where it may attract insects or animals.
For Etosha car window photography with a phone or small camera, brace both forearms against your body and let one hand touch the door only lightly. A folded cloth protects the device and reduces vibration. Never place loose equipment on the roof, bonnet or window edge where it can fall when the vehicle moves.
| Support | Useful for | Main caution |
|---|---|---|
| Beanbag on a lowered window | Long lenses and slow, deliberate subjects | Keep the camera strap, controls and driver’s view clear. |
| Hand-held with elbows tucked | Fast changes of side and short lenses | Raise shutter speed to compensate for movement. |
| Monopod inside the vehicle | Some guided vehicles with floor space | Confirm that it will not obstruct other passengers. |
| Window clamp | Specific compatible setups | Hard clamps can damage a rental vehicle and transmit vibration; ask before use. |
Position the vehicle before lifting the camera
Good Etosha car window photography begins with the driver, not the camera. Stop only where it is safe and permitted, remain on designated roads and keep enough space for another vehicle to pass. Do not block a junction, animal path, waterhole approach or the view of everyone already at the sighting.
If the subject is calm and the road allows it, position the vehicle so the window opens towards the light rather than directly into it. A slightly forward angle gives a lens more room than shooting straight across a passenger. Turn off the engine only when it is safe, the driver agrees and the vehicle will not need to move immediately.
For Etosha car window photography in a self-drive car, agree who will work from which side before the day begins. Passengers should never swing a long lens across the driver’s face or controls. If the animal moves to the opposite side, lower the camera, communicate and change position without sudden noise.
Vehicle comfort affects the entire setup. The Namibia Travel Guide car-hire overview helps travellers think beyond the vehicle badge, while the Etosha guide to choosing a rental vehicle covers visibility, luggage and passenger space for safari days.
Settings for stable Etosha car window photography
A beanbag removes some camera shake; it does not freeze a walking elephant, a flicking bird or a vibrating vehicle. Choose shutter speed according to both focal length and subject movement. With modern stabilisation, a still subject may tolerate a slower exposure, but wildlife behaviour usually sets the stricter limit.
| Situation | Practical starting approach | What to watch |
|---|---|---|
| Large animal standing still | Moderate shutter speed with stabilisation on | Breathing, ear movement and small head turns. |
| Animal walking | Faster shutter speed and continuous autofocus | Keep space in front of the direction of travel. |
| Bird taking off | Very fast shutter speed and burst mode | Do not hold the shutter down before the action starts. |
| Low light at a waterhole | Stable support, wider aperture and higher ISO | Accept some noise rather than repeated motion blur. |
Use those rows as concepts for Etosha car window photography, not fixed camera settings. Test your own equipment before the trip and check the first frame at high magnification. If every image is soft in the same direction, increase shutter speed or improve support. If focus is sharp on the wrong plane, adjust the autofocus area rather than blaming vibration.
When using a long lens, keep image stabilisation on unless the manufacturer recommends a different setting for a completely locked support. A beanbag is not a tripod. Short bursts of two or three frames often capture a steadier moment without creating hundreds of nearly identical files.
Composition through a car window
Etosha car window photography is often limited to one angle, which makes composition more important. Resist filling every frame with the animal. Include pale pan, mopane woodland, dust, another species or the line of a waterhole when those elements explain where the encounter is happening.
Leave room for movement
Place a walking animal with more open space in front of its head than behind its tail. If it is watching something outside the frame, leave room in the direction of its gaze. A central composition can work for a symmetrical portrait, but it should be a choice rather than the default produced by the autofocus point.
Use the window frame as a boundary, not a subject
In Etosha car window photography, check the four corners for mirrors, pillars, another passenger and bright clothing. Move the camera a few centimetres before attempting a heavy crop later. Keep the lens hood inside the vehicle unless you have ample clearance; striking the door or another camera can startle both passengers and wildlife.
Photograph behaviour sequences
A drinking animal lowering its head, pausing and lifting again tells more than one isolated portrait. Anticipate the sequence and make a few deliberate frames. For smaller devices, the guide to phone photography in Etosha explains why a wider environmental view often works better than extreme digital zoom.
Dust, glare and heat haze
Open windows make Etosha car window photography vulnerable to dust. Keep lenses mounted during the drive, close the unused windows when another vehicle passes and wipe the exterior with a blower or soft brush before using a lens cloth. Do not grind dust into glass. A hood helps with stray light and gives the front element some physical protection.
Heat haze is an atmospheric problem rather than a camera-support problem. Etosha car window photography over a long sunlit distance can remain soft even when the camera is perfectly steady. Photograph earlier, wait for the subject to approach naturally, or compose it as a smaller part of the landscape. Sharpening cannot recover detail that moving air has distorted.
A polarising filter may reduce some glare but it also costs light and can create uneven skies with a wide lens. Rotate it while looking through the viewfinder and remove it when the shutter-speed penalty becomes more important than the reflection control.
Nine Etosha car window photography habits
- Prepare the camera before entering a sighting so adjustments are quiet.
- Keep a beanbag within reach but never loose on the window edge.
- Ask the driver before changing position or attaching any support.
- Switch off the engine only when safe and practical.
- Use enough shutter speed for the animal as well as the camera.
- Check every edge of the frame for mirrors, pillars and passengers.
- Make a wide habitat image before moving to a tight portrait.
- Lower the camera when your presence changes the animal’s behaviour.
- Secure all equipment before the vehicle moves.
The ethical limit for Etosha car window photography is simple: the photograph must not require feeding, calling, crowding, leaving the vehicle or blocking the animal. The official Parks Canada wildlife-photography guidance offers broadly useful principles on distance, baiting and calls; Etosha’s current rules and staff instructions remain the authority in the park.
Etosha car window photography rewards anticipation more than equipment. Build a stable position, watch how the animal is likely to move and make fewer frames with a clear purpose. The window then becomes part of a calm field technique rather than a restriction.
Etosha car window photography: common questions
Can I rest a lens directly on the window glass?
Do not rest valuable equipment on the upper edge of raised glass. It is narrow, hard and easy to knock, and the window mechanism was not designed as a camera support. Lower the glass fully or to a safe level, cover the door edge with a clean padded beanbag and keep one hand on the camera. If the window cannot be lowered, hand-hold the camera with your elbows tucked in. Never force the mechanism or attach a clamp without the vehicle owner’s permission.
Should the engine always be switched off?
Switching off can remove a major source of vibration, but safety and traffic come first. The driver may need to reposition promptly, keep air-conditioning running for a vulnerable passenger or avoid restarting repeatedly. In Etosha car window photography, the decision belongs to the driver. If the engine remains on, lift the lens slightly from the door, use a faster shutter speed and make a short test burst. A stable vehicle with an idling engine can still produce sharp photographs when technique and settings compensate.
What is the best beanbag filling for a fly-in trip?
Carry an empty, double-layered bag and fill it after arrival if practical. Dry beans or rice mould closely around a lens but add considerable weight and should be stored carefully. Synthetic beads are lighter, yet a torn bag can release persistent litter, so use a sealed inner liner and inspect the seams. A folded jacket or towel is a workable emergency support for Etosha car window photography, provided it cannot slip outside or interfere with the window controls. Empty or clean the bag before crossing borders where agricultural restrictions may apply.
How do two photographers share one vehicle?
Assign sides at the start of a drive, then alternate good opportunities instead of both leaning across the same opening. Keep bags and straps out of the centre space, announce a lens change and secure every item before moving. When a sighting favours one side, the photographer with the clear view should work first while the other watches for a wider angle or later movement. Calm cooperation is part of successful Etosha car window photography and protects the driver’s visibility. It also gives every passenger a fair chance to observe the animal without competing for the same narrow opening.
Related photography guides
- Phone photography in Etosha — manage digital zoom, heat haze and exposure.
- Two-camera setup for Etosha — reduce lens changes and dust.
- Photographing lions ethically — protect space and natural behaviour.