
Choose an Etosha photography guide for field judgement, not for a gallery of dramatic close-ups. A strong guide understands animal behaviour, the park’s roads and rules, light, vehicle positioning and the point at which a photograph would cost the animal too much.
The right person also understands your experience and equipment. A beginner may need calm help with shutter speed and autofocus; an experienced photographer may care more about vehicle seating, backlighting, behaviour and time with a single subject.
Ask practical questions before paying a deposit. The answers should be specific, respectful and honest about uncertainty. No guide can guarantee a leopard, a kill, a dust bath or a perfect sunset.
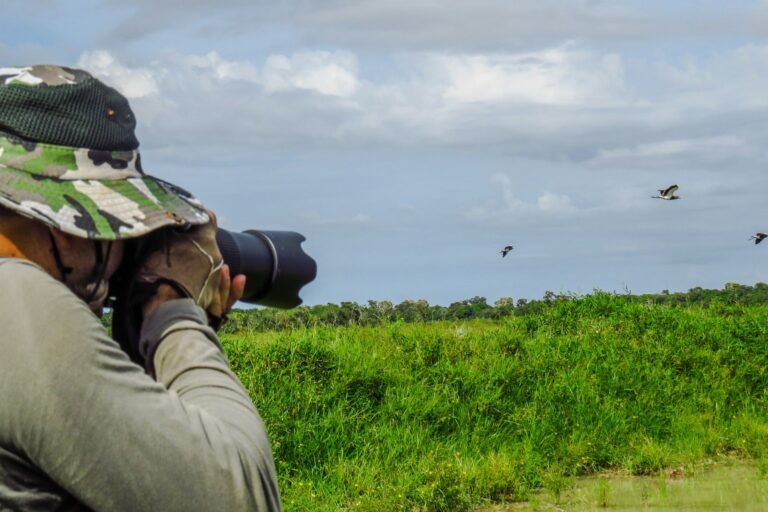
Define the job before choosing an Etosha photography guide
Name the subjects, not only “wildlife”
List the priorities that would change the drive: elephants, waterhole behaviour, birds in flight, animals in habitat, monochrome landscapes, family memories or a broad safari record. A guide can then suggest a sector, time budget and vehicle arrangement without promising a sighting.
Describe the photographer
Share whether you use a phone, bridge camera, mirrorless or DSLR system; the longest lens; mobility requirements; and confidence with manual controls. If several photographers travel together, explain whose priorities lead the drive.
Decide how much waiting feels enjoyable
Some photographers will spend an hour with one herd; others want variety. Neither is wrong. An Etosha photography guide should know whether the group prefers patient observation, broad exploration or a balanced combination.
Separate workshops from guided drives
A dedicated photography workshop may include tuition, image review and a small photographer-only group. A guided safari may focus primarily on natural history, with photography supported where possible. Ask which service is actually being sold.
Check the guide’s wildlife ethics first
Animal welfare must beat the image
Ask what the guide does when an animal changes direction, stops feeding, repeatedly looks at the vehicle or shields young. The good answer involves reducing pressure, holding back or leaving—not finding a more aggressive angle.
The U.S. National Park Service’s ethical wildlife photography guidance emphasises distance, quiet behaviour and avoiding actions that frighten animals. The habitat differs from Etosha, but the welfare principle travels well.
No bait, playback or provoked reactions
Food, scents and calls should never be used to manipulate wildlife for a photograph. Do not request revving, shouting, clapping or blocking an animal to force eye contact or movement. Natural behaviour is the subject.
Park rules are not negotiable
The vehicle stays on authorised roads and travellers leave it only at permitted places. The guide should explain these limits before the first exciting sighting, when decisions are easier.
Crowds require restraint
A responsible guide does not wedge the vehicle into a dangerous gap or trap an animal between cars. Sometimes the ethical choice is a more distant view, a different position or departure.
The National Wildlife Federation’s photography guidelines place wildlife welfare above the desire for an image and require disclosure of manipulation such as baiting.
Look for Etosha-specific field knowledge
The guide reads habitat before rumours
A useful explanation connects animal needs with woodland, open plains, water, wind and season. The guide may consider recent reports, but should not spend the day racing from one message to another.
Behaviour matters more than location lists
Ask how the guide recognises tension in elephants, readiness to drink in giraffes or alarm in antelope. Behavioural knowledge improves safety and helps the photographer anticipate a sequence without provoking it.
The route includes the exit plan
Local knowledge includes realistic drive time, comfort stops, gate requirements and a final direct road. An Etosha photography guide should not trade the safety margin for one more distant sighting.
Honesty is evidence of experience
A guide who says “it depends” and then explains the variables is more credible than one promising a fixed species at a fixed waterhole. Wildlife distribution changes with rainfall, disturbance and food.
That honesty should appear throughout the Etosha photography guide briefing and booking terms.
Inspect the vehicle, seat and group size
| Feature | Why photographers care | Question to ask |
|---|---|---|
| Window or open side | Controls angle, reflections and lens movement | Does every photographer have an unobstructed opening? |
| Seat allocation | Determines shooting side and space | Is a window seat guaranteed or rotated? |
| Roof and shade | Affects heat, glare and safe working position | Can a long lens be used without leaning outside? |
| Support | Reduces vibration and fatigue | Are beanbags supplied, and what rail shape fits them? |
| Group size | Changes time and positioning | How many active photographers share the vehicle? |
| Dust protection | Affects cameras and bags | Where can equipment stay closed and secure? |
Private is useful, not automatically better
A private vehicle gives control over subjects and waiting time, but the guide and ethics still matter. A small shared group can work when expectations align and seats are fair.
Ask the Etosha photography guide to describe the exact seat plan for the booked departure.
Long lenses must stay inside the vehicle outline
Ask where a telephoto lens can rest without obstructing the driver or another passenger. Doors remain closed where required, bodies do not climb onto vehicle edges and equipment never becomes a safety hazard.
Plan for two bodies without demanding them
Two cameras can reduce lens changes in dust, but they add weight and clutter. A good guide works with the equipment you own and helps prioritise shots; buying more gear is not a booking requirement.
Match the guide’s teaching and communication style
Ask for an example explanation
Invite the guide to explain how they would approach a backlit elephant or a bird in flight. The answer should be understandable at your level and include behaviour and positioning, not only camera settings.
Agree on commands
Short phrases such as “stop”, “roll forward”, “clear on my side” and “everyone ready” prevent confusion. The driver controls safe movement. A passenger can request a position but should not shout conflicting instructions.
Clear phrases help the Etosha photography guide protect both the sighting and the vehicle.
Make space for non-photographers
If partners or children join, confirm that the pace, commentary and stops suit them too. A vehicle full of frustrated people will not become a better hide. The Etosha photography guide should know the group is mixed before departure.
Review is optional but valuable
Some guides can review images between drives and explain one change for the next session. Confirm whether this is included. It should never reduce rest or create pressure to process a full portfolio while travelling.
Confirm the practical booking terms
- Exact duration, departure point and return point.
- Private or shared vehicle, maximum guests and seat policy.
- Park fees, meals, drinks and accommodation inclusions.
- Camera support supplied and equipment the guest must bring.
- Deposit, cancellation and weather or closure policy.
- Guide identity or minimum qualification when guides rotate.
- Accessibility, age limits and medical information process.
- Image-use expectations if the guide or company photographs guests.
Read sample images carefully
A portfolio shows style but not how the image was made, whether the photographer was the named guide or whether the sighting is typical. Ask for context and never treat a rare image as a promised itinerary.
Check recent, specific reviews
Look for comments about patience, communication, vehicle space and ethical conduct. A review that merely lists animals says little about the guiding process.
Use those details to compare one Etosha photography guide with another on service rather than species totals.
Eleven questions for an Etosha photography guide
- How much of your guiding work takes place in Etosha?
- How do you respond when an animal shows signs of disturbance?
- Is the departure private or shared, and how many photographers join?
- Does every photographer receive a clear opening and fair seat?
- What camera supports are supplied?
- Can you teach at my experience level and with my equipment?
- How do you balance patient waiting with exploring a route?
- What subjects and habitats suit the booked sector and season?
- Which fees, meals and transfers are included?
- What happens if roads close, weather changes or a vehicle fails?
- Which sightings or results can you not guarantee?
Turn the first enquiry into a photography brief
| Brief item | What to tell the guide | What a useful reply includes |
|---|---|---|
| Experience | Camera model, lenses, subjects photographed and controls you can change quickly | A teaching plan suited to your actual level rather than a generic masterclass. |
| Subjects | Priority species, habitat images, behaviour, birds or low-light work | Honest seasonal possibilities and alternatives when the priority is absent. |
| Style | Patient sequences, portraits, environmental frames or a balanced mix | A route and waiting strategy instead of a promise of sightings. |
| Comfort | Mobility, heat, cold, breaks, food and preferred drive length | Vehicle details and a realistic plan for the group. |
| Output | Personal memories, publication, a portfolio or technical learning | Clear discussion of positioning, ethics and any file-review service. |
Describe the equipment exactly
List each camera body, the focal-length range of every lens, tripod or beanbag needs, battery system and any physical limitation. A guide cannot plan supports or seating around “a big lens” with no dimensions. If equipment will be hired, confirm the handover, insurance and practice time before the first drive.
Explain whether two bodies must remain ready, whether a passenger shares equipment and how quickly you can change settings. The best Etosha photography guide adapts the vehicle routine to the equipment without allowing cases, straps or supports to interfere with safe driving.
Ask for a vehicle diagram
Request a current photograph or seating layout for the actual vehicle. Count the openings available to photographers, not the advertised passenger capacity. Ask how bags are secured, whether beanbags fit, whether roof supports are permitted and how passengers rotate when subjects appear on one side.
A shared departure needs a fair seating policy agreed before entry. Constant seat changes near wildlife create sound and lost time. A private vehicle gives control only if its window height, roof and guide communication also suit the photographer.
Define ethical limits in advance
Ask what the guide does when an animal changes direction, stops feeding, shields young or repeatedly watches the vehicle. A strong answer includes creating distance, changing angle or leaving. It should reject calling, baiting, blocking movement and pressuring another vehicle to move.
Discuss nesting birds, dens and sensitive locations. Exact coordinates should not be shared publicly, and photography must remain on permitted roads and in authorised areas. A rare frame does not justify changing the subject’s behaviour.
Separate fieldcraft from camera tuition
Some guides excel at finding animals and reading behaviour; others also teach exposure, autofocus and composition. Decide which service is central. Ask for examples of instruction given to clients with similar equipment and experience, not only the guide’s own portfolio.
A beginner may need calm help with shutter speed and focus mode before a sighting. An experienced photographer may value prediction, position and long waits. Both deserve a brief that tells the guide when to speak and when silence is more useful.
Check the proposed rhythm
Ask how an ordinary drive balances searching with staying. A guide who always races to radio calls may miss behaviour and create crowded scenes. One who waits all day without reassessing may ignore weather, distance and the client’s goals. Look for a process that uses evidence and remains willing to change.
Confirm departure, return, meals, park rules and the plan for heat, wind or rain. If low light is important, ensure the legal operating window and accommodation location make it possible without rushing.
Understand the price and deliverables
The quotation should identify guide, vehicle, group size, park fees, meals, transfers, equipment and cancellation terms. Ask whether image review, editing tuition or file transfer is included. Do not assume a premium price includes private use or specialist photographic support.
Compare the full match rather than the cheapest daily rate. A shorter, well-designed session with the right guide and vehicle may produce more learning than several generic drives.
Review the guide after the experience
Judge the day by safety, ethics, communication, field decisions and improvement in your observation—not by the rarity of the animal photographed. Wildlife results are uncertain. A guide who protects the subject and explains why a position was abandoned has delivered professional value even when the wish-list species never appears.
Send a final confirmation message
Before travel, reconfirm the guide’s name, meeting point, departure time, vehicle, group size and equipment promised. Include any change to mobility, camera system or subject priorities. Ask which personal items remain your responsibility and whether batteries or memory cards can be replaced locally.
Keep the reply with the booking and arrive early enough to load safely. This final check prevents a vague sales description from becoming the operating plan and gives both client and Etosha photography guide the same realistic brief.
If the confirmed arrangement differs materially from what was sold, resolve it before the park day. Do not expect a field guide to rebuild seating or specialist supports at the gate.
Prepare a small personal shot plan
Choose three skills to practise, such as tracking a walking animal, exposing against the pale pan and composing a habitat frame. Share them with the guide. A focused plan gives the day a useful outcome even if the priority species is absent and prevents every sighting from becoming a frantic settings lesson.
Keep the list flexible. When unusual behaviour begins, observation and animal welfare take precedence over completing an exercise. Review the three skills at the end and note what to practise before the next drive.
Ask the guide to explain one missed opportunity as well as the successful frames. A branch, harsh light or late reaction can teach position and anticipation without blaming wildlife. Keep a few imperfect files for that discussion. The purpose of the review is to improve decisions under real conditions, not to manufacture a portfolio that hides everything the day taught.
Common photo-guide questions
Does a guide need to be a professional photographer?
Not always. Exceptional fieldcraft, ethical judgement and communication may matter more. For technical tuition or portfolio development, however, verify the person’s photographic teaching experience.
Should I pay more for a private vehicle?
Consider it when control of pace, seat and subjects is central. First confirm the actual vehicle and guide; “private” describes exclusivity, not quality.
Can the guide guarantee big cats?
No ethical operator can guarantee a wild animal. Ask how the guide creates good opportunities without chasing rumours or disturbing subjects.
A credible Etosha photography guide protects uncertainty instead of selling it as a guarantee.
What should a beginner practise first?
Practise focus, exposure compensation, changing shutter speed and supporting the camera before travel. Then the guide can concentrate on field decisions. Our Etosha elephant photography guide shows how behaviour and settings work together.